Title: Other – Iray Vellus Horizon Shader System for Genesis 8 Female – download for Daz Studio or Poser
Description:
Add new layers of realism, softness, and warmth to your close-up and portrait renders, with the Iray Vellus Horizon Shader System for Genesis 8 Female.
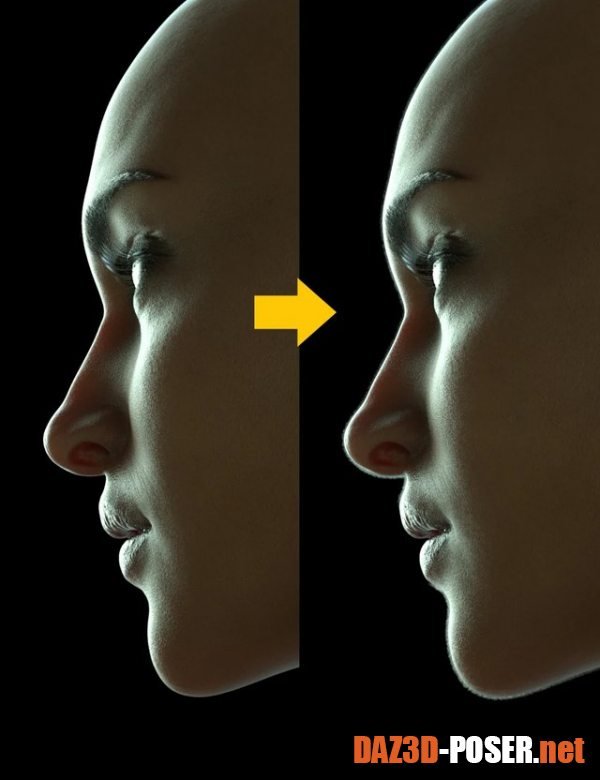
Real human skin is covered with a soft, delicate, and barely visible layer of "peach fuzz," composed of nearly microscopic vellus hairs. Under certain lighting conditions, this layer shows itself at the visible edges of skin surfaces, creating what is known as the "vellus horizon." Typically, 3D figures lack this layer, robbing them of an essential component of realism and giving their skin an artificially smooth appearance. Even with fibermesh hair systems designed to mimic vellus hair, typically only the larger vellus hairs are depicted, and the vellus horizon remains largely absent.
Enter the Iray Vellus Horizon Shader System for Genesis 8 Female. This simple product simulates the vellus horizon using custom-made, Iray-displacing shaders that are applied to a simple geoshell. The effect is controlled with hand-painted alpha maps that cover the entire figure body, mimicking real-world vellus hair distribution patterns. And since they are shaders, you have ultimate control over everything from displacement strength, to opacity, to hair length right in your surfaces tab. So you can adjust it until it looks just the way you want it to. You can even tint the hair if desired using the translucency color channel. Since you apply the shaders only to the areas you need in a given render, they can be quite resource-friendly, as well. They can even work alongside your existing fibermesh vellus hair systems to give them the missing optical effect of a vellus horizon.
The workflow couldn't be simpler. With your figure selected in the Scene tab, apply a geoshell (choose "Parent to Selected Item"). Then, with the geoshell selected in both your Scene Tab and your Surfaces tab, apply the included Geoshell Prep properties preset. After that, simply apply the desired shaders, as needed for your render, to the corresponding material zones of your geoshell. It's just that easy.
Home Page: LINK


